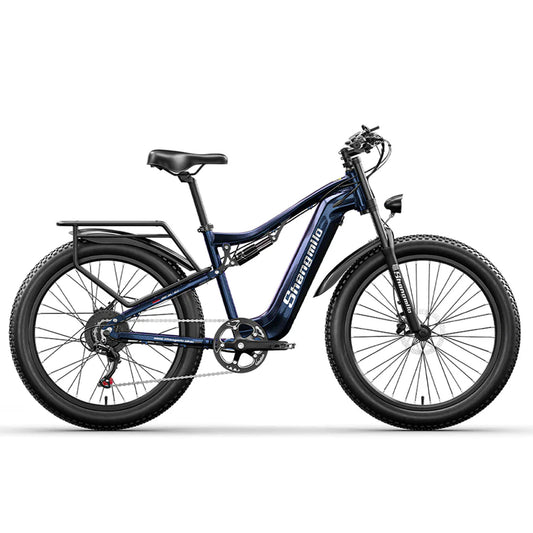
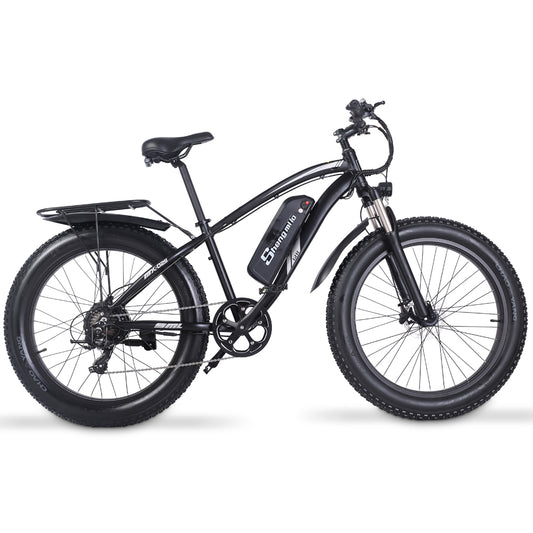
Hot-Sale 2024 New Arrival Ebike:


Shengmilo E-bike LCD Display User Manual - KING-METER NOKEE-U
This document is suitable for Shengmilo MX03/MX04/MX05/MX06.
Product Name and Model
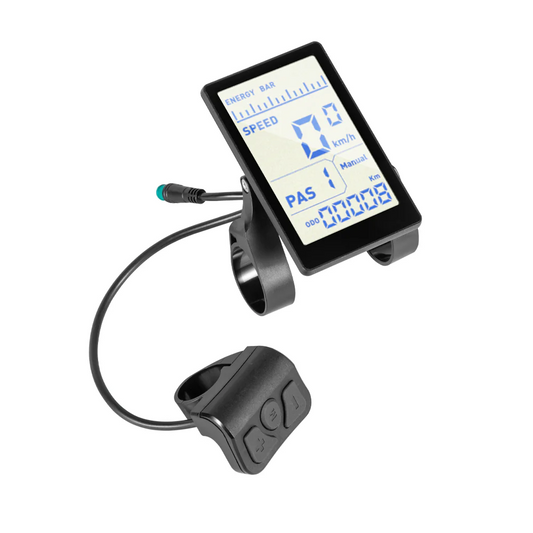
Intelligent LCD display for E-bike; model: NOKEE-U.
Appearance and Size
Display appearance and dimension figure (unit: mm)

Function Summary
◆ Function Summary
NOKEE-U can provide a lot of functions to fit the users’ needs. The indicating contents are as follows:
- Battery indication
- Speed indication (incl. running speed, max speed and average speed)
- Odometer and trip distance (including single mileage indication and total mileage indication)
- Push-assistance level indication
- Backlight On/Off
- Trip time indication
- Error code indication
- Multiple setting parameters. (Such as: wheel diameter, speed limit, battery power setting,
- multiple assist gear selection and assist parameter setting, power-on password setting,
- controller current limit setting, etc.)
- Recover default settings
◆ Button Definition
Most of the buttons are made of PC material, the button part is made of soft silicone material, and the whole body is black. There are three buttons on the NOKEE-U button. Including the power button, "plus" button, and "minus" button. In the following instructions, the button is replaced by the text [MODE]; the button is replaced by the text [UP]; the button is replaced by the text [DOWN].

◆ Functional Area Distribution

General Operation
◆Switching the E-bike System On/Off
Briefly press the [MODE] button to switch on the E-bike system, To hold the power button for 2 s again, the E-bike system will be switched off.
When switching off the E-bike system, the leakage current is less than 1 uA.
■When parking the E-bike for more than 10 minutes, the E-bike system switches off automatically
◆Display Interface
After switching on the E-bike system, the display will show Speed and Total Distance by default. Pressing the [MODE] button and [UP] button will show more riding data as follows:
Running
Speed (Km/h)→ Ave. Speed (Km/h) →Max. Speed (Km/h)

Briefly press the [MODE] button to switch to the mileage information page, and the display sequence is: TRIP A (single mileage A) → TRIP B (single mileage B) → ODO (cumulative mileage)

◆Switching Push-assistance Mode On/Off
To activate the push-assistance function, hold the [DOWN] button always. The E-bike’s drive is activated at a uniform speed of 6 Km/h. And “WALK” shows on the screen.
The push-assistance function is switched off as soon as you release the [DOWN] button on the operating unit.

■Push-assistance function may only be used when pushing the E-bike. The danger of injury when the wheels of the E-bike do not have ground contact while using the push-assistance function.
◆Turn on/off headlights
To turn on the headlights, press the [UP] button for 2 s. When the logo
appears on the display, it will light up. Press the [UP] button again for 2 s to turn off the headlights.

◆Battery indicator
There are 5 long battery bars from left to right, representing the capacity of the battery. Each grid symbol of the battery pack has 2 short battery bars equivalent to approximately 20% capacity. When the battery is low, the battery box will blink at 1 Hz to indicate that the battery needs to be charged immediately.

Note: When the battery power is displayed as shown on the right, it means that the battery is under voltage, please charge it in time!
◆Error Code Indication
The components of the E-bike system are continuously and automatically monitored.
When an error is detected, the respective error code is indicated in the text indication area.
Here is the detailed message of the error code in Attached list 1.

■Make the display repaired when an error code appears. Or else you can not ride the bike.
General Settings
To access the general settings menu, hold both the [UP] button and the [DOWN] button for 2s.
■All the Settings are operated in the case of parking the E-bike.
◆Trip Distance Clearance
TRIP A/ TRIP B represents the trip distance clearance setting.
To clear the trip distance, press the [MODE] button or the [DOWN] button until the single trip distance is zero.
◆Unit km/mp Conversion
ST1 represents unit settings, "MPH” is a mile, and “KM/h” is a kilometer. The default value is “KM/h”.
To convert a unit, press the [UP] button or the [DOWN] button to choose the desired setting item, and then press the [MODE] button to confirm.
To store a changed setting, press the [MODE] button and then access the trip distance clearance settings.
Or, hold the [MODE] button for 2 s and then exit General Settings.

General Parameter Settings
To access the general parameter Settings interface, hold both the [UP] and the [DOWN] button for 2 s and then hold both the [DOWN] and the [MODE] button for 2 s again.
◆Wheel Diameter Settings
Wheel diameter settings electable values include 16, 18, 20, 22, 24, 26, 700C, and 28.
To change basic settings, press the [UP] or the [DOWN] button to increase or decrease until the desired value is displayed.
To store a changed setting, press the [MODE] button. Then access the speed-limit settings interface. The default value is 26 inches.

◆Speed-limit Settings
If the current speed is faster than the speed limit, the E-bike system will switch off automatically.
The speed limit range is 12 km/h to 40 km/h. The default value is 25 km/h.
To change basic settings, press the [UP] or the [DOWN] button to increase or decrease until the desired value is displayed.
To store a changed setting and exit General Parameter Settings, hold the [MODE] button for 2s.

Personalized Parameter Settings
Personalized Parameter Settings can match a variety of requirements in use.
There are 8 settings items, such as Battery Power Bar Settings, Power Assistant Level Settings,
Over current Cut Settings, Power Assistant Sensor Settings, Speed Sensor Settings, Throttle Function Settings, System Settings, and Power-on Password Settings.
To access the Personalized Parameter Settings items option page, hold both the [UP] and the [DOWN] button for 2 s, then hold both the [UP] and the [DOWN] button for 2 s again.
To access the corresponding settings page, press the [UP] or the [DOWN] button to increase or
decrease until the desired item is displayed, and then press the [MODE] button to confirm.
◆Battery Power Bar Settings
VOL represents voltage settings. Each bar represents a voltage value. 5 bars voltage values must be entered one by one. For example, VOL 1 is the first bar voltage value. The default value is 48V.
To set the battery power bar, press the [UP] or the [DOWN] button to increase or decrease the number. To store a changed setting and access the second bar, press the [MODE] button.
Likewise, after 5 bars of voltage values are entered completely, hold the [MODE] button to confirm and then return to the previous menu.

◆Assistance Level Settings (optional)
Assistance Level Option
In assistance level settings, there are 8 modes to select:0-3, 1-3, 0-5, 1-5, 0-7, 1-7, 0-9, and 1-9.
The default value is 0-5.
To change the mode of assistance level, press the [UP] or the [DOWN] button to choose the desired mode, and then press the [MODE] button to confirm, then access the PAS ratio settings page automatically.

PAS Ratio Settings
To modify the value of the PAS ratio, press the [UP] button or [DOWN] button to choose the desired value, and then press the [MODE] button to confirm.
For example, the range is “30-50 percent” for level “1”, the ratio value can be modified, and the default value is 40 percent.
To store the modified setting, press the [MODE] button and move to the next PAS ratio settings.
After all, PAS ratios are input, hold the [MODE] button for 2 s to confirm and then return to the previous menu.

◆Controller Over-current Cut Settings (optional)
CUR represents controller over-current cut settings. CUR value can be changed from 7.0A to 18.0A. The default value is 15A.
To change basic settings, press the [UP] or the [DOWN] button to increase or decrease the value of the current.
To store a changed setting, hold the [MODE] button and then return to the previous menu.

◆Power Assistant Sensor Settings (optional)
The Direction of PAS Settings
PAS represents power assistant sensor settings. “run-F” means forward direction, while “run-b” means backward direction. The default value is “run-F”.
To change The Direction of the Power Assistant Sensor Settings, press the [UP] or the [DOWN] button to select F or b.
To store a changed setting, press the [MODE] button and then access the settings mode of PAS sensitivity.

The Sensitivity of PAS Settings
SCN represents the sensitivity of PAS settings. The sensitivity value is “2” to “9”. “2” is the strongest, and “9” is the weakest. The default value is “2”.
To change the sensitivity of PAS settings, press the [UP] or the [DOWN] button to select the sensitivity value.
To store a changed setting, press the [MODE] button and then access magnet disk settings mode.

◆Magnet Quantity Settings
n represents magnet numbers on the PAS disk. The default value is 064.
To change magnet numbers on the PAS disk, press the [UP] or the [DOWN] button to select the quantity according to the PAS disk. The larger the value, the more obvious the pedal assist feeling.
To store a changed setting, hold the [MODE] button and then return to the previous menu.

◆Speed Sensor (optional)
SPS represents speed sensor settings. The default value is 1.
To change speed sensor settings, press the [UP] or the [DOWN] button to select the quantity of magnet head on the wheel spoke (the range is from 1 to 9).
To store a changed setting, hold the [MODE] button and then return to the previous menu.

◆Throttle Definition (optional)
Hnd, it refers to throttle function setting, including 2 sections: HL and HF.
HL represents "throttle" setting, i.e. push-assistance by turning the throttle.
HL-n means throttle push-assistance function is disabled. HL-y means throttle push- assistance function is enabled. The default value is HL-n. means throttle is disabled and will enter Throttle-PAS setting. If Hl-y, then will return to the previous menu.

Throttle -PAS Enable/Disable
HF represents the "throttle-PAS" setting.
HF-y means throttle speed is limited by current assist level while HF-n means throttle speed is not limited by current pedal assist level. The default value is "n".
If you choose "y", the maximum speed can only be the highest speed powered by current pedal assist level when you twist the throttle.
If you choose "n", the maximum speed is not limited by current pedal assist level and you can override whatever pedal assist level you are at and reach rated maximum speed when you twist the throttle.

System Settings (optional)
◆Delay Time Settings of Battery Power
DL represents the delay time of battery power settings. The default value is 3 s.
To change delay time settings, press the [UP] or the [DOWN] button to select delay time 3 s, 6 s, and 12s.
To store a changed setting, press the [MODE] button and then access the max speed limit.

◆Button Push-assistance Enable/Disable
PUS represents button push-assistance settings. Y represents button push is enabled, and N represents button push is disabled. The default value is Y.
To change button push-assistance settings, press the [UP] or the [DOWN] button to choose Y or N.
To store a changed setting, press the [MODE] button and then access PAS speed settings.

◆Push-assistance Speed Settings
To change PAS speed settings, press the [UP] or the [DOWN] button to adjust from 20% to 35%.
To store a modified setting, press the [MODE] button and then access slowly start up.
The default value is 25%

◆Slowly Start-Up Settings
SSP represents a slow start-up. The range is “1-4”, and “4” is the slowest. The default value is “1”.
To slowly start up settings, press the [UP] or the [DOWN] button to select the desired value.
To return to the previous menu, hold the [MODE] button for 2s.

◆Power-on Password Settings
“P3” on the screen means power-on password settings. The default password is 2962.
To access the power-on password settings, press the [UP] or the [DOWN] button to modify the value and then press the [MODE] button to confirm digits one by one until the correct 4-digit password is completed, and then press the [MODE] button to access power-on password enable settings interface, otherwise stay on the password input state.

Operation Cautions
Be careful of safe use. Don’t attempt to release the connector when the battery is on power.
- Try to avoid hitting.
- Do not modify system parameters to avoid parameters disorder.
- Make the display repaired when an error code appears.
Attached list 1:Error code definition
| Error Code | Definition |
| 21 | Current Abnormality |
| 22 | Throttle Abnormality |
| 23 | Motor Abnormality |
| 24 | Motor Hall Signal Abnormality |
| 25 | Brake Abnormality |
| 30 | Communication Abnormality |
| 31 | Power Button Abnormality |
| 34 | 6km function button Abnormality |
Best Selling
-
Shengmilo S600 2000W Dual Motor Samsung Battery Electric Bike (2024 New arrival)
Normale prijs €1.599,00 EURNormale prijsEenheidsprijs per€1.999,00 EURAanbiedingsprijs €1.599,00 EURAanbieding -
Shengmilo MX06 Step Through E-bike 48V 17.5AH SAMSUNG Battery
Normale prijs €1.298,00 EURNormale prijsEenheidsprijs per€1.499,00 EURAanbiedingsprijs €1.298,00 EURAanbieding -
SHENGMILO MX03 Bafang Motor Samsung Battery Mountain Electric Bike
Normale prijs €1.298,00 EURNormale prijsEenheidsprijs per€1.599,00 EURAanbiedingsprijs €1.298,00 EURAanbieding -
Shengmilo MX05 Bafang 1000W Samsung Battery Fat-tire Ebike [Pre-Sale]
Normale prijs €1.298,00 EURNormale prijsEenheidsprijs per€1.599,00 EURAanbiedingsprijs €1.298,00 EURAanbieding -
Shengmilo MX02S Black 48V 17AH 1000W Powerful Off Road Mountain E-bike
Normale prijs €1.229,00 EURNormale prijsEenheidsprijs per€1.599,00 EURAanbiedingsprijs €1.229,00 EURAanbieding


![Shengmilo MX05 Bafang 1000W Samsung Battery Fat-tire Ebike [Pre-Sale]](http://shengmiloshop.com/cdn/shop/files/1_19d7f792-d9ce-4935-8ab7-2e642cf33c9d.jpg?v=1722431825&width=533)
-
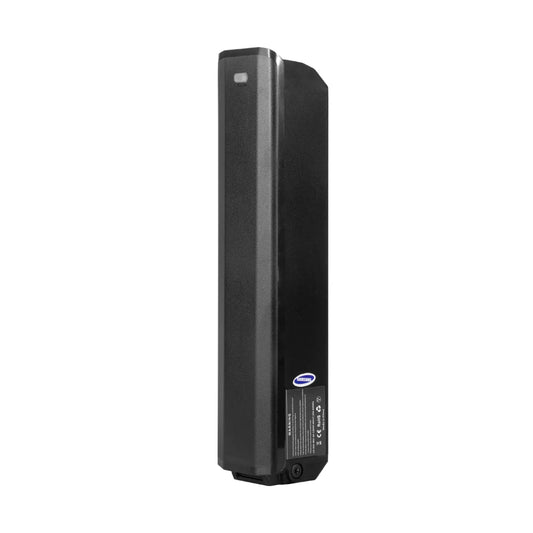
17.5AH Original SAMSUNG Battery for Shengmilo S600/MX03/MX05/MX06
Normale prijs €429,00 EURNormale prijsEenheidsprijs per -
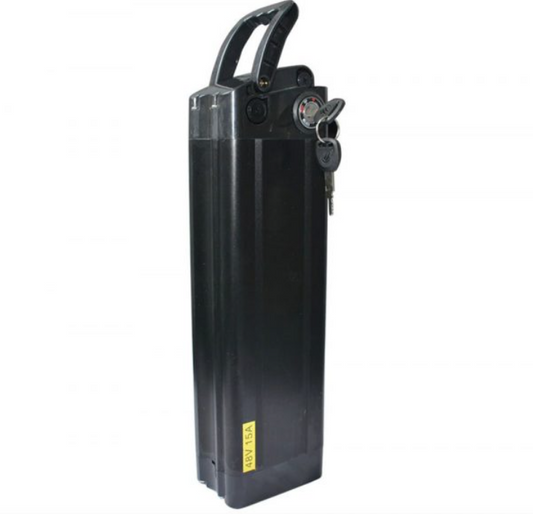
15AH Original Battery for Shengmilo mx20
Normale prijs €379,00 EURNormale prijsEenheidsprijs per -
Original Motor Core for Shengmilo MX02S/MX03/m90/New mx03/mx04/mx05/mx06 BAFANG MOTOR
Normale prijs Vanaf €179,00 EURNormale prijsEenheidsprijs per -
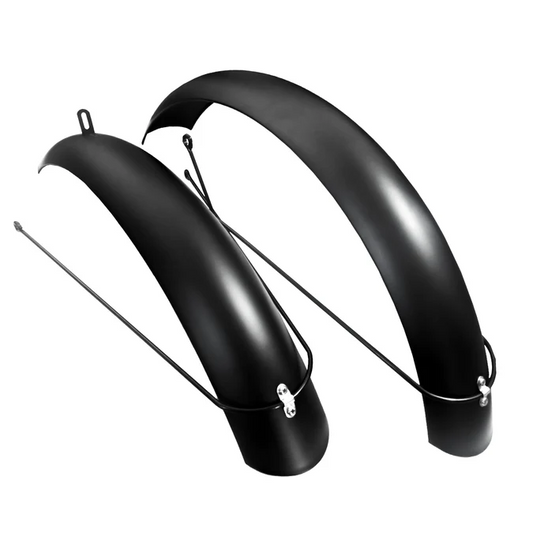
Original Fender for Shengmilo E-bike
Normale prijs €159,00 EURNormale prijsEenheidsprijs per -
original Oil Brake for MX03/MX05/MX06/S600/MX02S
Normale prijs €139,00 EURNormale prijsEenheidsprijs per -
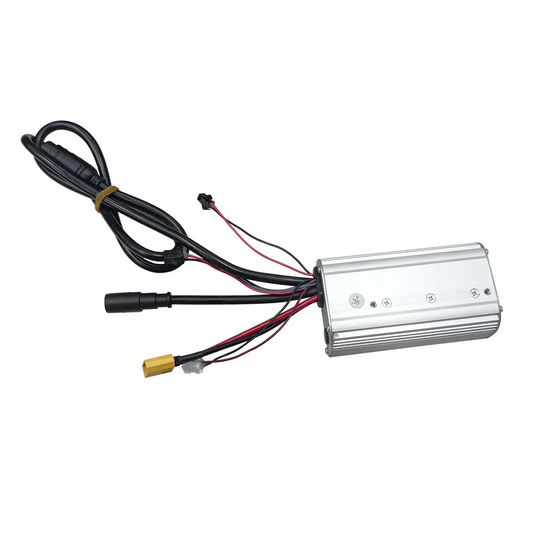
Shengmilo e-bike original controller 48V
Normale prijs €119,00 EURNormale prijsEenheidsprijs per€129,00 EURAanbiedingsprijs €119,00 EURAanbieding -
Original Display(include Button) For Shengmilo MX03/MX04/MX05/MX06
Normale prijs €109,00 EURNormale prijsEenheidsprijs per -
Mountain Electric Bike Helmet with Lighted Goggles all-in-one Ultra-light
Normale prijs €79,00 EURNormale prijsEenheidsprijs per -
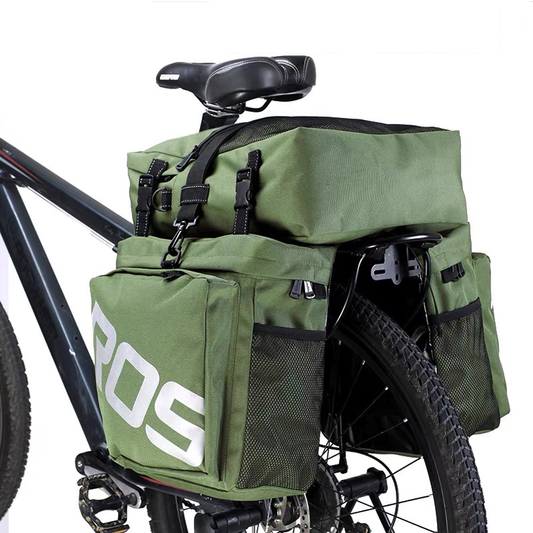
3 In 1 Trunk Bags Double Side for Shengmilo E-bike
Normale prijs €79,00 EURNormale prijsEenheidsprijs per€89,00 EURAanbiedingsprijs €79,00 EURAanbieding -
Original Charger for Shengmilo Electric Bikes
Normale prijs €59,00 EURNormale prijsEenheidsprijs per -
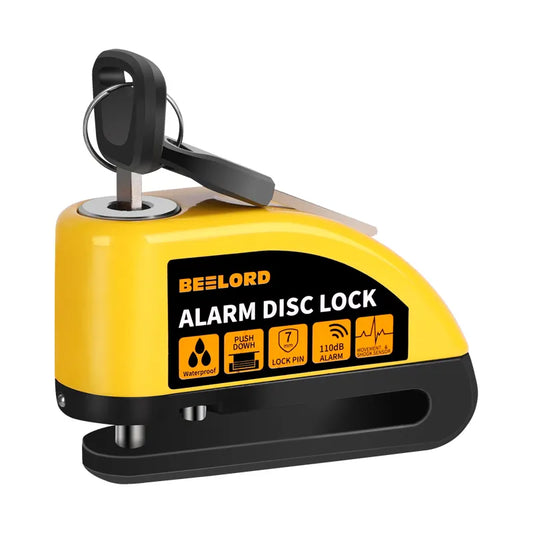
Disc Brake Alarm Lock with Reminder Cable Bike Lock for Shengmilo e-bikes
Normale prijs Vanaf €49,00 EURNormale prijsEenheidsprijs per -
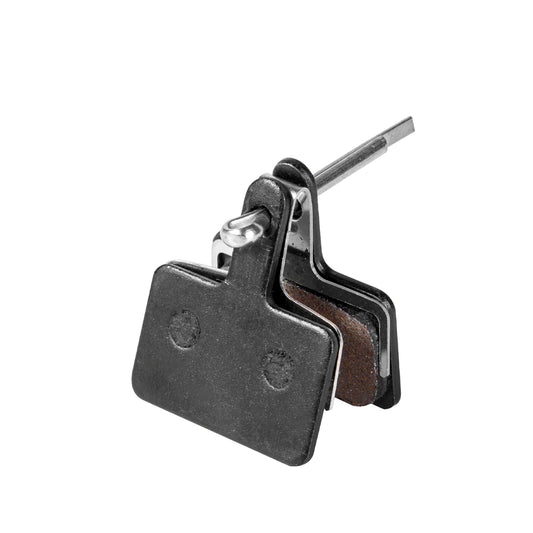
Original Brake Pads for Shengmilo All E-bike Models
Normale prijs €19,99 EURNormale prijsEenheidsprijs per