Shengmilo MX05 Owner's Manual

1.About Manual
This manual contains details of the product, information on its operation and maintenance, and other helpful tips for owners. Read it carefully and familiarize yourself with the Shengmilo MX05 before using it to ensure safe use, reduce the risk of damage and premature wear, and prevent accidents. Be sure to retain this manual as your convenient Shengmilo MX05 information source.
This manual contains many Warnings and Cautions concerning safe operation, and consequences if proper setup, operation and maintenance guidelines are not followed. All information in this manual should be carefully reviewed.


Users should also pay special attention to the information. Marks in this manual beginning with” NOTICE ”
Because it is impossible to anticipate every situation or condition which can occur while riding, this manual makes no representations about the safe use of our bicycles under all conditions. There are risks associated with the use of any bicycle which cannot be predicted or avoided, and which are the sole responsibility of the rider. You should keep this manual, along with any other documents that were included with your bicycle, for future reference, however all content in this manual is subject to change or withdrawal without notice.
Visit https://shengmiloshop.com to view the latest version. Assembly and first adjustment of your Shengmilo MX05 require special tools and skills, and it is recommended that this be performed by a trained bicycle mechanic if possible.
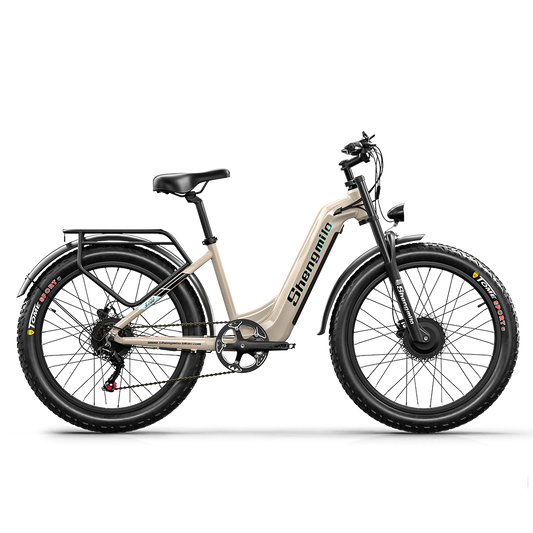
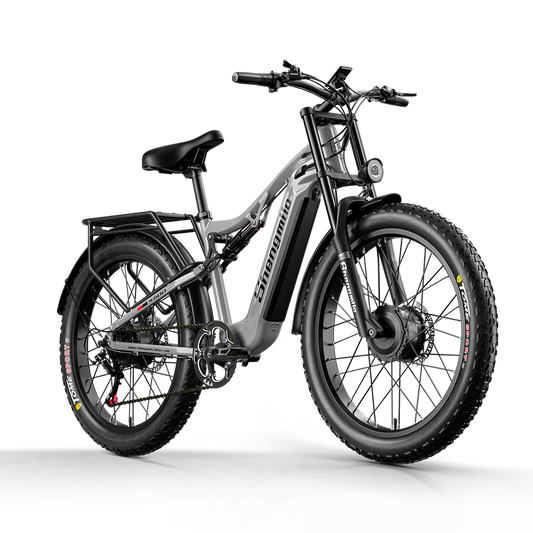
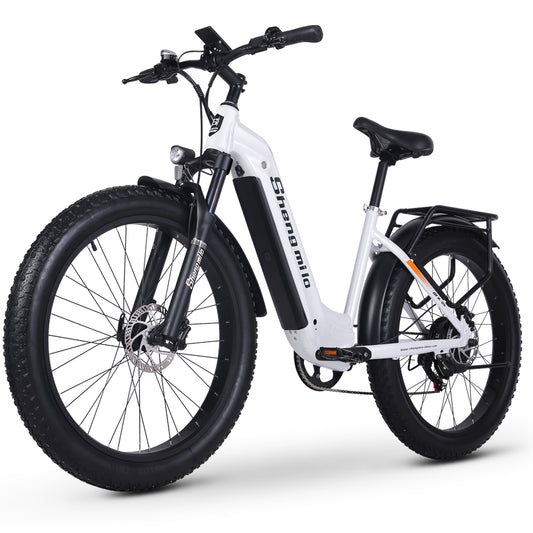
2.Bike Specication


|
Battery |
48 V 17 . 5 Ah lithium battery |
Charger |
48V 2.0 A smart charger |
|
Range |
Throttle mode 30 -35 km; 50-60km pedal assist mode |
Controller |
Sine wave brushless motor controller |
|
Motor |
500W BAFANG Geared Hub Motor |
Display |
KING-METER waterproof LCD display |
|
Total Payload Capacity |
400 lbs (180kg) |
Weight |
70.5 lb (32KG) |
|
Recommen ded Rider Heights |
5′5″ ~ 6′6″ (170-200cm) |
Pedal Assist Intelligent |
0~ 5 level pedal assist |
|
Tires |
26" x 3" non-slip fat tires |
Throttle |
Half twist throttle |
|
Brake |
Disc brakes |
Front Fork |
Double Shoulder Fork |
|
Horn |
Super loud electric horn |
Pedal |
Wellgo Alloy pedals with reflectors |
|
Freewheel |
Shimano 7-speed gear shift system |
Bike Frame |
6061 Aluminum frame |
|
Brake |
Disc brakes |
Headlight |
Bright motorcycle light |
|
Chain |
KMC chain |
Saddle |
Thick and comfortable leather seat |
|
Stem |
Promax MA-400 SSABK |
Seatpost |
Diameter 30 . 4 mm length 350 mm |
|
Crankset |
170 mm forged alloy |
Kickstand |
Heavy-duty aluminum |
|
Gearing |
Shimano, TX55/7 speed rear puller |
Spokes |
Front wheel 13G*255/Rear wheel 13G*218 |
3.Bike Assembly Guide
- Preparation Checklist

Extra tools needed: (1)13mm Wrench (2) 15 mm Wrench
NOTICE:
Before assembling your bike, it’ s recommended to remove the battery for the reasons outlined below:
- Determine if there’ s battery drain or damage during shipping.
- Reduce the weight of the e-bike to make it easier to maneuver the bike while assembling.
- Avoid battery damage during the assembly process.
- Go to "15.1.Charging Procedure for Off-bike Charging" to learn about removing and charging the battery.
4.Recommended Torque Values
|
Hardware Location |
Recommended Torque( NM) |
|
Handlebar |
12-18 |
|
Stem |
12-18 |
|
Saddle |
12-18 |
|
Front Wheel(For bikes with bolts on front wheel) |
15-22 |
|
Rear wheel |
30-38 |
|
Bottom Bracket Parts |
30-50 |
|
Pedals |
28-33 |
|
Disk Mounting Bolts |
3-5 |
|
Disk Caliper Mount |
6-8 |
|
Crank Bolts |
32-36 |
|
Rear Derailleur Cable Pinch |
3-5 |
|
Front Derailleur Clamp |
3-6 |
|
Saddle Post Clamp |
3-6 |
NOTICE: Using an impact driver to achieve the required torque is not recommended as it might cause damage. We suggest you use the wrench set we provided and extra tools to manually adjust nuts and bolts.
5.Assembly Instructions
5.1.Handlebar Installation ( 4mm Hex Wrench )
Step 1: Loosen the bolts on your bike stem.
Step 2 : Center your handlebars and rotate them to align to the marking pointed to in the below image.


Step 3: Tighten bolts to handlebar stem, but don’t tighten completely as you may want to further adjust the angle later to align more precisely. After determining the best position, completely tighten all the bolts on the stem.

5.2.Front Wheel Installation
Step 1: Prepare your quick-release skewer for the next step by removing the thumb nut and one of the cone spring.

Step 2: Install the quick-release skewer starting from the brake rotor side of the wheel, inserting the quick-release skewer through the hub and then replacing the second cone spring on the other side.Ensure both springs are pointed narrow-side-in towards the wheel hub.


Step 3 : Tighten the thumb.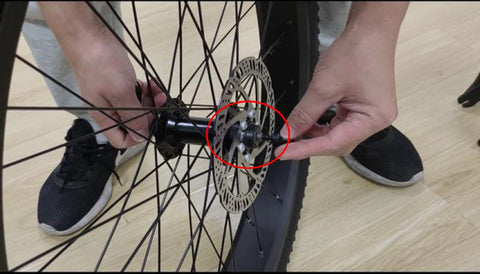
Step 4 : Align the fork dropouts with the axle of the wheel hub, making sure the dropouts are securely positioned on the axle. Also ensure the brake rotor is properly inserted into the caliper.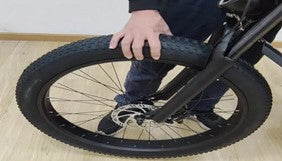
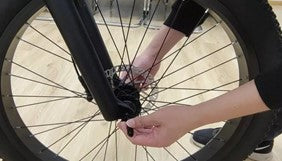
Step 5 : Tighten the thumb nut until the quick-release lever is held in line with the axle, and then use your palm of your hand to close the quick-release lever.


Step 6 : Rotate the front wheel. Make sure the quick release skewer lever on the front wheel is fully closed, and check the wheel balance in Pedal- Only Mode. If you notice the riding is imbalanced or the rotation of the front wheel makes noise, it means the bolts were not completely tightened or not aligned horizontally.
5.3.Headlight & Front Fender Installation
The headlights are attached with a bolt, and you'll need a 4mm wrench to tighten its nut.
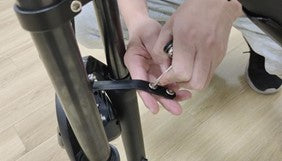
Step 1 : Loosen the bolts on the headlight. Align the headlight bolt holes with the holes on the fork bracket, then re-thread the bolts through all holes and tighten the bolts with a 4mm wrench extractor retaining nut.

Loosen the bolts on the headlights with a PH1 wrench.

Align the headlight bolt holes with the holes on the fork bracket

Set the nut to tighten the bolt
Step 2 : Loosen the bolts on the front fender holder. Align the front fender bolt holes with the holes in the holder, then re-thread the bolts through all holes and tighten the bolts with 6mm wrench retaining nuts.
Loosen the bolts on the front fender holder with a 6mm hex wrench
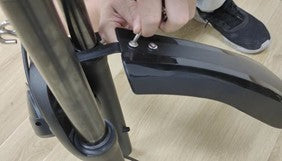
Tighten the bolts with 6mm wrench retaining nuts.
6.Adjust the Seat Height
Open the seatpost quick release lever. Adjust the seatpost height by sliding the seatpost up or down to a height appropriate for your leg length and preferred riding position. Do not extend the seatpost beyond the minimum insertion marking etched onto the seatpost.
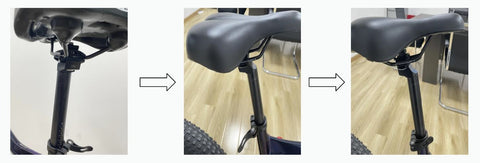
NOTICE: The seat angle has been preadjusted to factory safety standards. Please make note of original settings, and only adjust if necessary.
7.Pedals Installation (15mm wrench)
Make sure your pedals are installed on the correct side, as installing on the wrong side will damage the threads. Indicators for the right pedal (R) and the left pedal (L) can be found in two places: the stickers on the plastic cover, and the bottom of the pedal threads.


Before you install the pedals, apply a small amount of waterproof grease onto the spindle. Start threading the pedal on by hand to ensure the pedal is going in perfectly straight, rotating in the direction of the pointer shown on the crank. If it is not spinning smoothly, make doubly sure that you have the correct left or right pedal. After initial hand-tightening, finish tightening the pedals with a standard 15mm wrench .


|
Safety Check |
Basic Steps |
|
Brakes |
o Test front and rear brakes for proper function. o Ensure brake pads are not overworn and are correctly positioned in relation to rims. o Make sure brake control cables are lubricated, correctly adjusted and display no obvious wear. o Check that brake control levers are lubricated and tightly secured to handlebars. |
|
Wheels and Tires |
o Inflate tires to within recommended limits displayed on sidewalls. o Check for bulges or signs of excessive wear. o Clean tires to ensure tread is exposed. o Ensure rims run true and have no obvious wobbles or kinks. o Check that all wheel spokes are tight and not broken. o Check the wheel balance in Pedal Only Mode. If you notice the riding is imbalanced or the rotation of the front wheel makes noise, it means the bolts were not completely tightened or not aligned horizontally. |
|
Chain |
o Check that chain is oiled, clean and runs smoothly. o Use extra care in wet or dusty conditions. |
|
Cranks and Pedals |
o Securely tighten pedals to cranks. o Ensure cranks are securely tightened and are not bent. |
|
Derailleurs |
o Check that derailleur(s) are adjusted and functioning properly. o Ensure shift and brake levers are attached to handlebar securely. o Check all brake and shift cables for proper lubrication. |
|
Motor Drive |
o Ensure hub motor is spinning smoothly and motor bearings are in good working order. o Check that all power cables running to hub motor are secured and undamaged. o Make sure hub motor axle bolts are secured and all torque arms and torque washers are in palce. |
|
Battery Pack |
o Ensure battery is charged before use. o Check for any visible damage to battery pack. o Lock battery securely to frame. |
8.Shengmilo E- Bike Use and Care
The following table of contents provides general guidance on Shengmilo e-bike variable power assist settings and their effects on both range and perfor- mance. This content will apply broadly to most riders, but multiple factors will affect individual results including rider fitness and weight, terrain, proper maintenance, etc. While Shengmilo hopes and believes you will thoroughly enjoy your e-bike, no guarantees of universal performance characteristics for all owners can be given.
9.Basic Display Settings
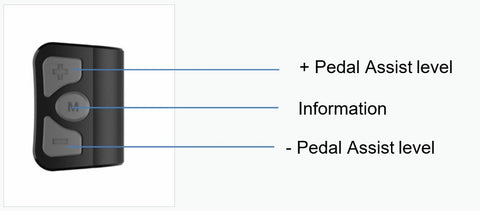
9.1.Control Panel
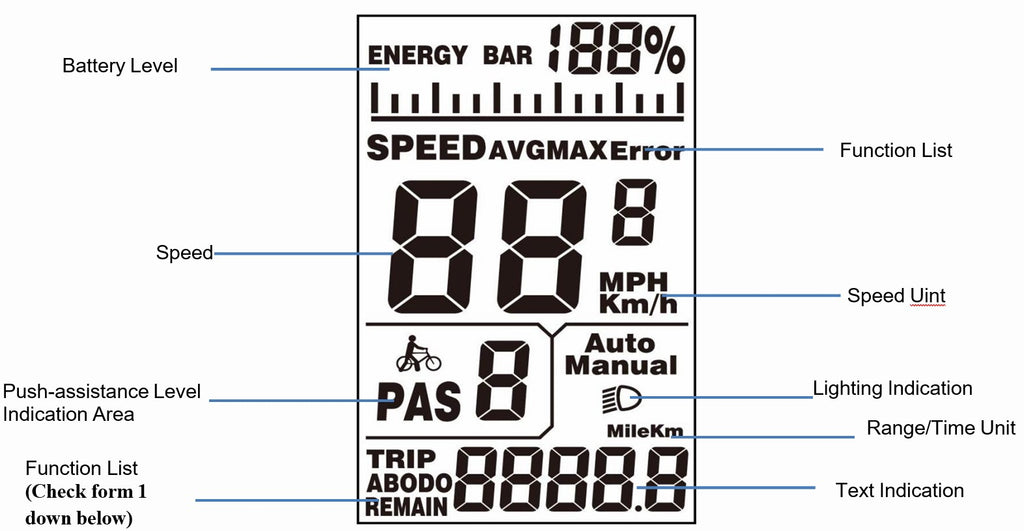
9.2.Display Screen
|
TRIP |
Single mileage(km) |
21 |
Current Abnormality |
|
ODO |
Total mileage(km) |
22 |
Throttle Abnormality |
|
RIDETM |
Trip time indication |
23 |
Motor Abnormality |
|
ERROR |
Error code indication |
24 |
Motor Hall Signal Abnormality |
|
MAX.SPD |
Maximum speed(km/h) |
25 |
Brake Abnormality |
|
AVG.SPD |
Average speed |
30 |
Communication Abnormality |
|
WALK |
Walk Mode |
31 |
Power Button Abnormality |
10.Battery Charging
10.1.Charging Procedure for Off-bike Charging
Step 1: Find the keys located on the handlebar and remove them. If you cut them from the handlebars, be careful not to damage any of the wires.
NOTICE: Please keep your key and its spare in a safe place. Once lost, they are difficult to copy.

Step 2: Use the key to unlock the battery. While holding the battery with one hand, detach the battery by turning the release switch located on the underside of the frame.

Step 3 : Safest way to charge your battery
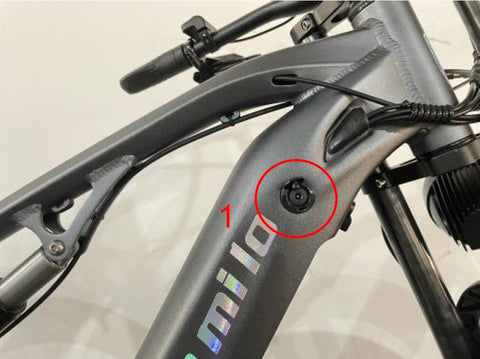
- Start by plugging the charger into the battery charging port. With the battery inside the bike, place the charger on a flat, safe place and connect the charger's DC output plug (barrel connector (2) )to the charging port (1) on the side of the battery.
- Plug the charger into an electrical outlet. Connect the charger input plug (3) (110-240 volt plug) to an electrical outlet. Charging should begin and the LED charging status light on the charger will show red.
- Unplug the charger from the outlet, then from the charging port. When fully charged, the charging indicator light changes from red to green, first unplug the charger from the wall outlet, then unplug the charger output plug from the battery charging port.

NOTICE: This order helps extend the battery life and effectively reduces battery damage caused by improper charging.
10.2.After Charging
- Please unplug the main power supply first by removing the plug from the power socket, then remove the DC port from the You can then check the battery status on the display screen.
- Insert the battery with caution, making sure that the slots at the bottom of the battery align with the pins on the bike frame, and slide in carefully to avoid damaging the interior circuitry.
- Lock the battery when finished to prevent theft.
NOTICE: If your battery displays abnormal charging behavior, such as:
- Longer-than-expected charge time
- Strange smell, smoke, or liquid emanating from battery and/or charger
- Overheating battery and/or charger
Please stop charging and contact https://shengmiloshop.com immediately.
10.3.Charging Tips
- The battery can be recharged on or off the bike.
- A new battery may take longer to be fully charged when depleted.
- The charger will automatically stop charging once the battery pack is fully charged.
- You can recharge the battery after short rides as it does not have a memory effect.
10.4.Precautions
- While charging, please keep your battery away from direct sunlight, liquid, dirt or debris, and metal objects. Do not allow the battery to be charged in environments under 14° Fahrenheit (-10° Celsius) and over 104° Fahrenheit (40° Celsius).
- Do not cover the charger when charging.
- Keep the battery away from children while charging.
- Make sure to only use an approved Shengmilo bike charger purchased directly from https://shengmiloshop.com for your specific bike serial number.
10.5.Before Riding
Ensure that the battery has been properly secured to the bike before each use by grasping the battery pack and pulling upwards, testing the security of the pack.
10.6.Battery Maintenance ( 4 8 V 1 7 . 5 A H Shengmilo Lithium battery)
- Do not fully drain your Turn off the power when the battery charge is low.
- Fully charge the battery after each use, no matter how much power is This will prolong the battery life. If battery power is not used for a long time, store the battery with a full charge and charge it once a month.
- The Shengmilo bike can be safely ridden in light However, riding through very heavy downpours or through flooded streets is not recommended, as the crank and/or motor can get wet, which may cause damage.
- Keep the battery away from open flame and other high-temperature heat Do not expose the battery to direct sunlight or recharge immediately after use in high-temperature weather.
NOTICE: It is not recommended to make any modifications to the battery or the motor. If the battery is tampered with, and there are any problems with the altered battery or motor, it will not be covered under Shengmilo's warranty.
11.Motor Maintenance (500W BAFANG Geared Hub Motor with 80 Nm of torque)
- Please check your motor frequently and tighten any loose screws or nuts, to prevent the vehicle from breaking down due to disconnected wires.
- The brushless motors are not waterproof, so avoid riding through water deeper than the lower edge of the electric wheel hub to avoid motor failure.
12.Chain Maintenance
- We recommend cleaning the chain after each ride, especially in rainy and humid environments. Use a dry cloth to wipe the chain and its accessories clean. Use a brush to remove sand and dirt stuck in the chain, along with use warm soapy water if needed. Do not use strong acidic or alkaline cleaning agents (such as rust remover), because these chemicals can damage the chain.
- Apply lubricating oil after cleaning to avoid First, make sure the chain is dry, and then apply the lubricating oil to the bearings.
- To prevent unnecessary chain wear, try to maintain a vertical chain position when shifting gears (do not use the smallest gear with the smallest flywheel, or the largest gear with the largest flywheel, etc).
13.Front Fork Maintenance
- Always use a clean, oil-free lint-free cloth with plain or soapy water to clean your To prevent water from flowing into the front fork, you can turn the bike upside down. Dry with a lint-free towel after washing. Pay specific attention to the inner tube and the dust seal to reduce wear and prevent thinning of the inner tube, which can lead to significant damage if the aluminum is exposed to air.
- We recommend using a front fork dust cover to protect the inner tube of your front This prevents dust from entering as well as hard objects from hitting the inner tube.
14.Limited Warranty
Your bike's warranty and other binding legal terms (e.g., terms of purchase, etc.) are subject to change at any time. To view the current warranty, please go to https://shengmiloshop.com/pages/warranty
15.Warranty Info
- All Shengmilo e-bikes are covered under our manufacturer's 1 year, 6 months, and three months warranty for the original owner against all manufacturing defects (All free Accessories are not covered by warranty service).
- Only the original owner of bikes purchased from Shengmilo's online store is covered by this Limited Warranty.
- The Warranty Period begins upon your receipt of the bikes and shall end immediately upon the earlier of the end of the Warranty Period or any sale or transfer of the bike to another person, and under no circumstances shall the Limited Warranty apply to any subsequent owner or other transfers of the bike.
- You must have the initial owner's name & the initial order number to start a warranty claim.
- The Covered Components are warranted to be free of defects in materials and/or workmanship during the Warranty Period.
16.WARRANTY WILL COVER
Shengmilo will replace any component that is deemed to be defective or damaged (including damage incurred during shipment) without user error. The warranty covers the listed products and follows the terms below:
16.1.Frame
- Shengmilo' frames are covered by a replacement warranty for 12 months.
- This warranty includes a replacement frame Labor charges to changeover parts to replacement frames are not included.
- Shengmilo reserves the right to use scratch and dent stock when replacing a frame under this Frame styles and/or colors not in stock may be replaced with a compatible style and/or color at the discretion of Shengmilo.
16.2.Batteries
- Shengmilo' batteries are covered by a 6-month prorated warranty.
- Defective batteries will send accessories to customers for free for self-repair during the 6-month service period. The warranty period for repaired batteries is based on the original purchase date.
- After the first 6 months of service 一 A prorated credit, based on months of service, will be applied toward the purchase of a new battery. Batteries purchased at pro-rated cost will have a new 6 months warranty based on the pro-rated purchase date.
- No cash reimbursement will be
- Batteries can be assessed and found defective directly by Shengmilo only.
17.Parts & Components
ALL Original Shengmilo bike's parts & components are covered by the warranty.
18.This Limited Warranty Does Not Cover:
- Normal wear and tear of any Covered
- Labor charges to changeover parts to replacement frames are not included.
- Consumables or normal wear and tear parts (including without limitation tires, tubes, brake pads, cables, housing, grips, chain, and spokes).
- Any damage or defects to Covered Components resulting from failure to follow instructions in the e-bike owner's manual, acts of God, accident, misuse, neglect, abuse, commercial use, alterations, modification, improper assembly, installation of parts or accessories not originally intended or compatible with the bike as sold, operator error, water damage, extreme riding, stunt riding, or improper follow-up maintenance.
- For the avoidance of doubt, Shengmilo will not be liable and/or responsible for any damage, failure, or loss caused by any unauthorized service or use of unauthorized parts.
- The Battery is not warranted from damage resulting from power surges, use of an improper charger, improper maintenance, or another such as misuse, normal wear, or water.
- Any products sold by Shengmilo that are not an e-bike.
19.Link to Assembly Video and Online Resources
19.1.Assembly Video
Please refer to the “COMMUNITY Video" at the Shengmilo website https://shengmiloshop.com/pages/videos to view the official Shengmilo S600 Assembly Video.
19.2.Online Resources
For more information on best practices, please visit the Shengmilo official website https://shengmiloshop.com or contact Shengmilo Product Support with any questions.
Best Selling
-
 €400OFF
Burchda HC26(2025 New Arrival)
Regular price €1.699,00 EURRegular priceUnit price per€2.099,00 EURSale price €1.699,00 EURSale -
 €530OFF
Shengmilo Burchda RX80(Upgraded)
Regular price From €1.169,00 EURRegular priceUnit price per€1.699,00 EURSale price From €1.169,00 EURSale -
 €300OFF
Shengmilo S900(2025 New Arrival)
Regular price €2.399,00 EURRegular priceUnit price per€2.699,00 EURSale price €2.399,00 EURSale -
 Sold out
Shengmilo S700
Regular price €1.599,00 EURRegular priceUnit price per€1.899,00 EURSale price €1.599,00 EURSold out -
 Sold out
Shengmilo S600
Regular price €1.599,00 EURRegular priceUnit price per€1.999,00 EURSale price €1.599,00 EURSold out -
 Sold out
Shengmilo MX06
Regular price €1.499,00 EURRegular priceUnit price per€1.699,00 EURSale price €1.499,00 EURSold out


-
15AH Original Battery for Shengmilo mx20
Regular price €429,00 EURRegular priceUnit price per€399,00 EURSale price €429,00 EUR -
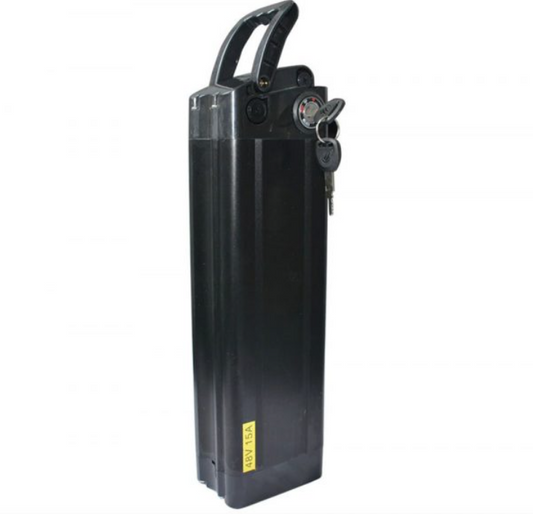
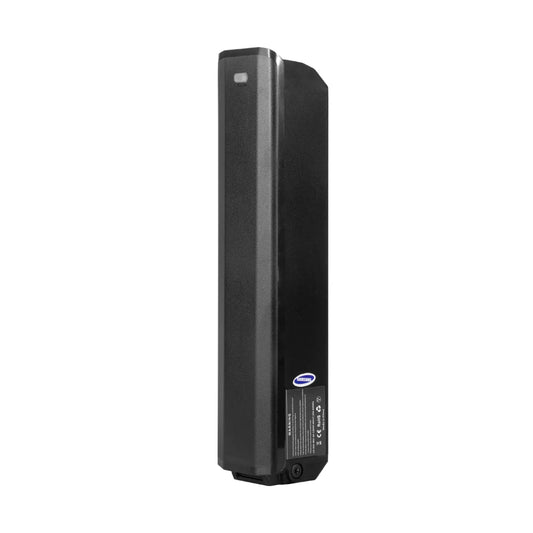
Original Battery for Shengmilo S600/MX03/MX05/MX06
Regular price €429,00 EURRegular priceUnit price per€459,00 EURSale price €429,00 EURSale -
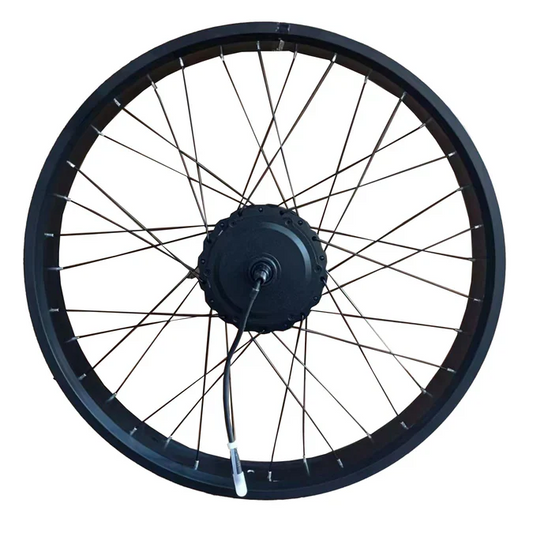
Original Wheel Hub With Motor For E-bike
Regular price From €419,00 EURRegular priceUnit price per€549,00 EURSale price From €419,00 EURSale -
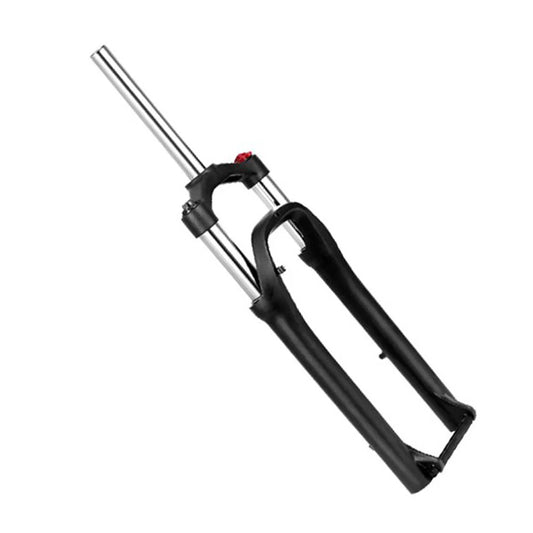
Shengmilo E-bike Front Fork
Regular price From €239,00 EURRegular priceUnit price per -
Original Motor Core for Shengmilo E-bike
Regular price From €229,00 EURRegular priceUnit price per€239,00 EURSale price From €229,00 EURSale -
Original Fender for Shengmilo E-bike
Regular price €189,00 EURRegular priceUnit price per -
Rear Storage Basket for Shengmilo Burchda E-bikes
Regular price €129,00 EURRegular priceUnit price per€119,00 EURSale price €129,00 EUR -
Original Hydraulic Brake / Mechanical Bbrake for Shengmilo E-bikes
Regular price €119,00 EURRegular priceUnit price per€139,00 EURSale price €119,00 EURSale -
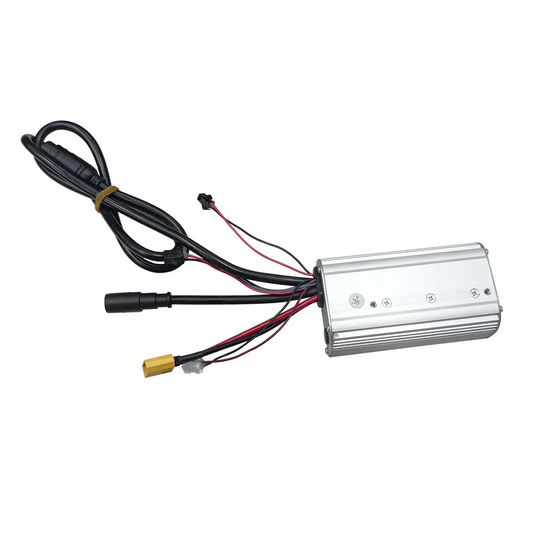
Shengmilo e-bike original controller 48V
Regular price €119,00 EURRegular priceUnit price per€129,00 EURSale price €119,00 EURSale -
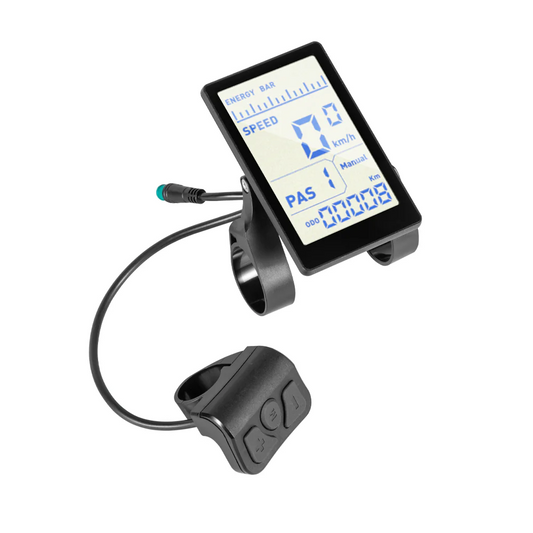
Original Display(include Button) For Shengmilo E-bikes
Regular price €119,00 EURRegular priceUnit price per€119,00 EURSale price €119,00 EUR -
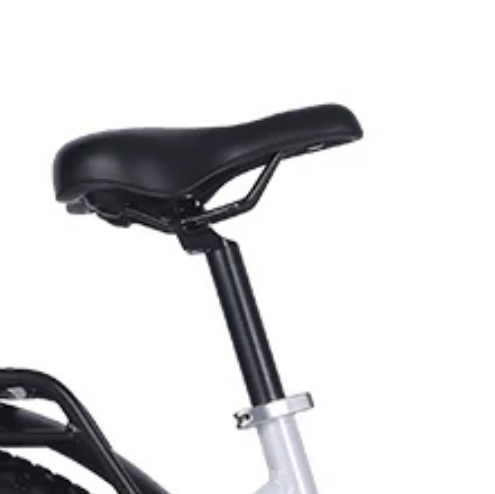
Original Seat for Shengmilo MX06
Regular price €109,00 EURRegular priceUnit price per -
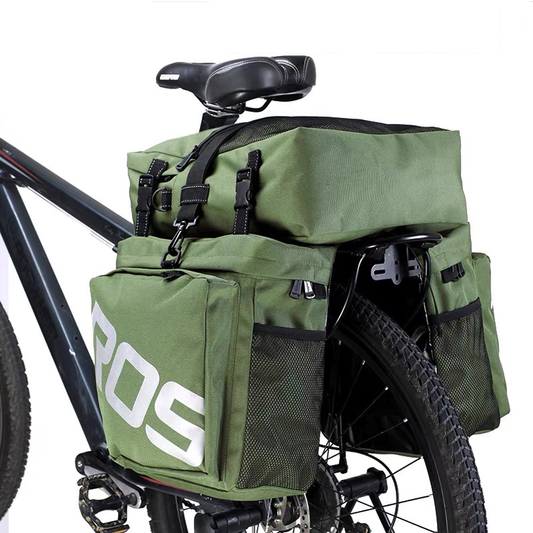
3 In 1 Trunk Bags Double Side for Shengmilo E-bike
Regular price €109,00 EURRegular priceUnit price per€89,00 EURSale price €109,00 EUR -
Burchda E-Bike Brown Leather Bag Durable Travel Bike Bag Mountain Bike Bag Luggage Bag
Regular price €99,00 EURRegular priceUnit price per€109,00 EURSale price €99,00 EURSale -
Shengmilo E-bike Crank Set
Regular price €89,00 EURRegular priceUnit price per€68,00 EURSale price €89,00 EUR -
Original Charger for Shengmilo Electric Bikes
Regular price €79,00 EURRegular priceUnit price per€79,00 EURSale price €79,00 EUR -
Mountain Electric Bike Helmet with Lighted Goggles all-in-one Ultra-light
Regular price €79,00 EURRegular priceUnit price per€89,00 EURSale price €79,00 EURSale